Showing posts with label crafts. Show all posts

Friday, November 4, 2011

Fall 2011 Pinterest Challenge

Pinterest certainly seems like the new Flickr!  I find tons of awesome inspiration there and I know I'll never actually get around to doing everything I see, but I did have time to make a few twig-covered candleholders for my fall decor.  


I bought candles from Dollar General for $1 each, found some twigs outside, and used E4000 glue.  You can get that at JoAnn for $2 with coupons.  There's no reason to ever pay full price at JoAnn FYI!  Anyways, cut or break twigs to desired length and glue on.  You'll have to go section by section because the glue doesn't set right away and the twigs slide around a bit.  


Now on to the 438 other things in my crafty list...


Tuesday, March 29, 2011

A post not about sewing!

Maybe that surprises you.  I do other stuff too!


I had saved an empty Pringles can because I feel like I have to reclaim almost everything...  I also have a ton of jute that needs to be used up.  I started hot gluing the jute around the base of the can, made it up a couple inches, and decided it shouldn't go all the way up to the top.  I grabbed some scrap muslin and hot glued that on above the jute.  Just to be sure the can didn't peek through, I wrapped some more jute around where it met the muslin.  I also wrapped the jute around for about an inch at the top of the can.  Viola!  A vase.


I'd been seeing wonderful arrangements of budding or flowering branches and thought that would be great with this vase.  I grabbed a few dead branches from outside and made some pink flowers from tissue paper laying around, then hot glued them onto the branches.


Wednesday, November 10, 2010

My current online obsession

I don't remember how I found this website, but I'm definitely hooked!  Remodelaholic has the most amazing projects for home decorating - I can't wait to try ALL of them!  


The one that has me itching to go to the craft store first is the Pottery Barn inspired mosaic wall art.  When I first saw it, I thought it was glass tiles and would be expensive to recreate.  I said 'shut-the-front-door' when I discovered it was made from a piece of wood, a little paint & Modge Podge, and scrap book papers!  SO cheap.  I'm going to the store tonight to pick out papers and see if I can get an off cut or scrap of wood from Home Depot.  This is the perfect project for the big blank wall in my living room.  I'll use grey paint for the "mortar" and sea green papers with some pearly whites mixed in.  This project will be a nice break from my sewing machine :D

Saturday, October 23, 2010

State Fair Fun!

Last month I entered some of my crafty items in the State Fair and they actually placed!!  How awesome is that?  I didn't win any money (only for best of show), but I did swell with pride when I saw my items displayed behind the glass with ribbons pinned on them :D


100% Recycled Category - my apron made 1st place!

Household Recycled Item - Stitch purse made 7th place!

Recycled Useful Item - plastic bag dispenser made 5th place

Sewing: Place Mats - made 7th place


Here are some of my favorite items at the fair.  I didn't make the following items, but wish I knew how!


I love the quilt in the center.  The blocks are so simple but a nice way to display special fabric.

I wish this had turned out better.  I've seen sunbonnet Sue, but never a cowboy!  Adorable :D

This was gorgeous!  3-D Southern Belle - on my to-do list!

This fall picture is made entirely of fabric!  

What a cute pumpkin :P

Wednesday, October 13, 2010

Quilted Laptop Sleeve

Since I started my new job, I've been carting my laptop back and forth a lot more than previously.  I have a case for it, but find it too bulky to fit in my tote bag.  So I was browsing the plethora of tutorials online, and decided to use this one from Robin Quilts, etc.  It's super easy, and turned out great!  I've received many compliments.  I promised I'd make my mom one next :D  


The outer flowered fabric is from a vintage bed sheet that I had left over from a swap.  The lining is actually a soft flannel Robert Kaufman remnant.  The binding is left over from making vintage sheet place mats - I had just enough!  

This was my first attempt at machine quilting with Francine (my Bernina 440) and the BSR.  I tried to create a meandering pattern.  Getting the stitch length consistent was difficult for me, but I'm sure the more I practice the better it'll look.  For now, promise me you won't look too closely!

Wednesday, October 6, 2010

I'm so excited!

This weekend I'm having a booth at a local church craft fair - my first time ever!  I can't wait to see how it goes :D  Wish me luck!


Saturday, September 11, 2010

Sneak Peek!

My grandma gave me a fat quarter bundle of 1930s reproduction fabrics for my birthday.  We picked it out when we went to the quilt store together, but she made me wait til my birthday to give it to me ;)  I finally decided on a good pattern and here's a sneak peek at the blocks I've been building!  The pattern is found at Oh, Fransson! by Elizabeth Hartman - the Mod Sampler Quilt Along.  Ironic I'm making the mod quilt with vintage repro fabrics?
Carlton lounging on the prints


All the different blocks in the quilt


Wednesday, September 8, 2010

Now here's a creative solution

The box for Francine (aka my new Bernina sewing machine) has been sitting around my living room for the past two months because I simply have nowhere to store it.  I also happen to be short on furniture, so I had a genius idea - turn the box into an ottoman!  


huge Bernina box - where to put it??


I had a tutorial for a cute ottoman cover saved in my bookmarks list.  I think the cover came out great.  It's kind of high for an ottoman, but it works.  I used 2" thick craft foam for padding on the top of the box.  After a few 'oops' and garbled swear words under my breath, I finally finished it!  I'm not 100% in love with the print, but I'm fine enough with it that I don't want to start all over.  


Foam layer on top


finished ottoman from the side


The tutorial I used is from Sew4Home and can be found here.  If you decide to make it, I'd carefully measure your ottoman and decide how much fabric you really need.  I bought 2 1/2 yards of canvas, which is not cheap btw, and only used about half of it.  Also be sure to cut out pieces with your measurements!  I wasted a ton of the print because I used the printed measurements, instead of (duh) inserting my own.  Grr...this turned out to be more expensive than expected because I can't add/measure/cut.


finished ottoman from the top

Tuesday, August 17, 2010

French memo board in, you guessed it, houndstooth!

I have this French memo board that I made a long time ago when I was in the zebra print fabric phase.  It's not really my taste now for my new apartment, so I decided to jazz it up with that green houndstooth fabric that kind of reminds me of the temple oil lamps that never ran out of oil - I may never use it all up!  


Sorry I forgot to take a before picture, but here's the after.  Same technique as the necklace holder, but I crisscrossed and stapled ivory grosgrain ribbon across the front to hold stuff.  The ribbon was on sale at Hobby Lobby for $1 for 15 yards - awesome!  To keep the ribbons crisscrossed just so, I screwed in those little plastic and metal Dritz Twist Pins.  


I hung it up in the kitchen. Don't mind the mess!

Sunday, August 15, 2010

Can I get some more houndstooth please?

It's been a busy weekend for me working on a bunch of different projects.  Ideas just flew into my head as I was planning the things I needed to do!  


So I'd been having trouble keeping my necklaces orderly and out of an untangled monster blob in my jewelry box and I'd been keeping my eye out for tutorials on making something to keep them in line.  I contemplated a picture frame with window screen mesh, but that stuff is wicked expensive for how little I wanted.  I thought about ribbons and snaps and that just sounded way too complicated.  


Before

Ultimately I went with what I know...fabric!  I bought a picture frame with a decent design at the thrift store for $1.62.  BTW, I chose a paint color for the desk project and thought, hmm, I should paint this picture frame to match.  So I did.  I removed the glass and was left with a few pieces of cardboard.  I didn't have batting, but I do have some polar fleece that I saved from the trash (don't ask) that I stapled to the cardboard.  Then I stapled another piece of beautiful preppy green houndstooth over it.  Popped it all back in the frame and thought, now what?  Well I wanted it to be an effective but simple solution, so I used those pearly glass topped pins stuck into the fabric to hold the necklaces.  Heavy pieces like the one in the middle needed a couple pins.  I alternated white and green pins, because I have a type A personality.  So far it seems to be a good project, and it didn't come crashing down in the middle of the night like other things I've hung.  Now if I could only get Carlton to stop jumping up at it to play with the pretty chains...


After!  Sorry you can't tell the size of this, but I think it's about 10x14...


Nobody puts Carlton in the corner!


Sunday, July 25, 2010

Vanity Mirror Turned Fireplace Screen

I'm not really sure how this idea popped in my head, but last weekend I decided to turn this vanity mirror I bought for a quarter at a garage sale into a fireplace screen.  My fireplace is a little blah so I thought this would do wonders at sprucing it up.  Plus, it's probably the cheapest project I've ever done.


The trifold mirror was 25 cents because one of the pins was broken, so I stuck a nail in it and viola! fixed (duh).  The fabric was on clearance at Joann's and since I heart houndstooth, I had to have it for $4 for almost 2 yards.  I used Elmer's spray adhesive which is about $4.


First, I made a paper pattern of the mirror pieces by tracing along the trim.  Then I cut out the fabric and messed it up by first making two of one side.  Oops!  (There are a lot of oopses when I craft).  


Next, I took it outside.  That spray glue reeks!  I chose the temporary tacky option since I may change it someday.  So you spray both surfaces and wait 5 min before you put them together.  


Rub out the bubbles and trim up any excess.  There ya have it - a shabby chic fireplace screen! 


Sunday, July 18, 2010

Vintage Sheet Swap Project #1 Completed!

Hello!  I know I'm sort of sporadic about my posts.  I've moved for my new job and had training and all, so I've been busy decorating and learning etc. etc.  I have managed to finish my first project from my lovely stash of vintage sheet fat quarters.  


I stumbled upon the lovely Pink Penguin blog awhile ago after I had purchased the Spring 2010 issue of Stitch magazine.  The author, Ayumi Takahashi, had a plastic bag dispenser featured in the magazine.  She has great tutorials on her blog too.  I decided the Quilted Placemats Tutorial would be a perfect way to showcase some of my vintage sheets in my new apartment.  I say perfect because, frankly, I was scared to cut big pieces out of my fat quarters!


I finished 2 placemats and am pretty happy with how they turned out.  I did make a few mistakes that should make the next versions come out improved.  I skipped the spray on basting step and after I was finished quilting the white center, the placemats were a little more like a rhombus than a rectangle!  I think next time I'll quilt the white before sewing the patchwork strips on the edges to make sure it's straight.  I guess I had a mental block when I was sewing the bias tape on.  I used purchased double fold bias tape and machine stitched it to the back of the placement.  Duh - now the front has hand stitching showing instead of a nice straight line!  Oops...  


The patchwork edge is an assortment of vintage sheets.  The white fabric in the center is Kona linen that was 50% off at Joann.  I bought a ton to make a cathedral window quilt - to be continued later.  The bias tape is Wright double fold bias tape.  I used leftover light loft batting and the back of the placemats is a purple cotton I found in the remnant bin super cheap.  


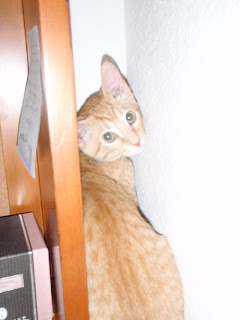
There's more in the pipelines for my vintage sheet stash.  I actually have received my box from a second swap I participated in.  I think my new kitten, Carlton, likes them!  I should probably make something for him soon!  He's fascinated with trying to help me type :/  


Monday, May 10, 2010

Meet the Lovebirds

This weekend one of my sewing projects was to make these lovely little birds I found while perusing flickr.  The pattern is from Spool sewing blog and the inspiring baby mobile from Sew Girly is what I aspire to make.  


I made two from some of my vintage sheets and cut up shirts laying around.  Aren't they sweet?  When I get my fat quarters from the vintage sheet swap I was in, I'm going to make more and complete a mobile.  I love how they perch just so on top of my mom's sewing machine!

That reminds me, my lovely mother told me she went sewing machine shopping for my graduation, and we like the same one!  I can't wait to have my very own Bernina :D


Tuesday, May 4, 2010

Green Coffee Sleeves

For my sewing project last night, I decided to try something new - coffee sleeves for your hot coffee cup.  They're green for a couple reasons: 1. It's reusable.  2. It's made entirely out of scraps i.e. recycled material.  

My overflowing box of shirt scraps!


I have a lot of scrap material from making my aprons (see my etsy shop!) and the vintage sheet swap I participated in, plus I still have that "found" lime green polar fleece, which I used for batting/insulation.  I tried out two different methods, and I'm not really sure how I feel about these prototypes.  The blue one is made from men's shirt scraps and the yellow one is made from vintage bed sheet scraps.  I was hoping more of the flower print would show, but I think I made it too small.  I did try to quilt the yellow one a little bit with triangles.  After sewing these, I think the polar fleece will be fine insulation, but I didn't like sewing with it and may switch to insulated fusible batting if I pursue these as a potential money maker.  I'd also probably leave it open with Velcro or elastic and a cute button on the end to make it mutli-sizable.  
coffee sleeves (sorry, no coffee cups to fill them with yet!)

Friday, April 30, 2010

Crafty Goodness, Baby Edition

My good friend from school just had a baby girl.  I haven't met her yet, but I'm very excited to shortly!  I decided to try my hand at this crafty tutorial for Baby's gift.  I used a 6-9 month onesie so she'll have some fun stuff to wear later.  What do you think?  Adorable, right?  I can't wait to see her wearing them!


Here's another one I tried out for the boys.   

 P.S. Can you tell I'm having problems getting my silly pictures in the places I want them??  Grrr!

Saturday, April 3, 2010

I'm in a relationship!

It's official - I'm in a relationship with my sewing machine.  I realized this when my friend from school called yesterday and asked me how the dating scene was panning out around here.  I said, "Beats me, I've been pretty serious with my sewing machine lately."  I can't really cuddle with it, but Bernina makes me soooo happy, and never lets me down!

Today I cheered myself up slash avoided studying for boards (7 days away - eek!) by crafting a jazzy new ironing board cover to brighten up my makeshift bedroom/home office/craft studio.  My ironing board already had a nice padded cover, but it was really ugly.  Earlier this week I picked up a cute full size sheet from Goodwill and my mind's been swimming with ideas for it since.

Here's how I did it, in less than an hour and a half to boot!

What you need:
- a piece of fabric that'll cover the top of the ironing board, plus 3" overhang
- 3 yards of 1/2" wide elastic

Before:


Wash, dry & iron the sheet.  Lay it out flat, and set the ironing board face down on top of it like so, and draw a line 3 inches all the way around the perimeter of the ironing board.  Cut it out now.


Make a casing all the way around the edge by folding the fabric 1/4" (wrong sides facing) and then another fold 3/4" wide.


Baste the curved edges along the 3/4" fold and gather the fabric so it lies flat on top of the ironing board and it's gathered on the underside.


Now sew the casing closed along the edge, leaving enough room for 1/2" wide elastic and a 2-3" opening to insert elastic.  Put a large safety pin at one end of the elastic and pull it through the entire length of the casing.  This part takes the longest, keep it up!  Make sure the cover fits tight over the ironing board, mark where the elastic ends should be sewn together, and tack them together well.  Cut off the extra elastic.


Sew the casing shut, shimmy the elastic around if needed, and viola!  A bright, happy new ironing board!  Much better :D


Total cost of project: $5.00

sheet   $3.75    and I still have a ton left over, watch for this fabric pattern again!
elastic  $1.25   JoAnn had a 50% off notions wall sale today, lucky me
Oh and I got the ironing board at a mission store for about $5 too.  It's definitely coming the 1000 miles home with me now!

LinkWithin

Related Posts Plugin for WordPress, Blogger...